
Do you need to verify your business on Facebook to get a blue tick? Is it worth paying for it? I’m researching the latest information from Meta to provide you with all the necessary information to make this decision. Join me as I explore in detail how to get a blue tick on Facebook in this article.

What is Meta (Facebook) verification?
In an effort to combat fake accounts, Meta has adjusted their verification feature to better suit the needs of the platform and its users. Instead of using verification to confirm whether you are a famous person or not, the focus has shifted to verifying the authenticity of businesses, brands, and personal social media accounts.
Whether it’s a personal Facebook profile or a business account, the higher your status and number of followers, the more susceptible you are to identity theft and impersonation. Receiving a blue checkmark on Facebook is now more accessible than ever since the launch of Meta Verify. This is a paid subscription program that provides you with a blue verified badge. According to the latest information from Meta, the cost of subscribing to this program is $11.99 per month on the web or $14.99 for iPhone users. You need to purchase the verification for both personal profiles on Facebook and Instagram separately, but if you buy them together, you will save $1.
In this article, I will focus primarily on verifying your Facebook Business Page. For businesses, Meta Verified registration starts at $21.99 per month for one platform on the web version ($34.99 for both Facebook and Instagram). If you purchase through the mobile app, the cost is $27.99 per account (Facebook/Instagram) and currently, you can only purchase one account.
Benefits of verifying Facebook Page
Meta Verify is a feature used to increase authenticity and security across all Meta services and combat fake accounts, impersonators, and fraudulent accounts. The blue Meta Verify badge signifies that a brand, business, or public figure has been verified on Facebook using government ID, business registration, or authorized representative. Some common reasons to receive the blue verified badge on Facebook include:
- Establishing legitimacy and authenticity of your brand or business page.
- Differentiating your brand from other similar terms that might make it difficult for users to find your business on Facebook.
- If you are a public figure, such as a speaker, artist, musician, or actors, getting verified would be more important so that fans know it is an official Facebook page versus a fan page or unofficial page.
- Verified pages rank higher in search results, which can help increase visibility and credibility.
How do you qualify for a blue tick on Facebook?
First of all, Meta Verified may not be available in your region as it is still being rolled out globally. If it isn’t, you can join the waitlist.
Your account must meet certain criteria before it is eligible for verification – whether a personal or creator account or a Business Facebook Page. Moreover, you won’t even see verification as an option if these requirements aren’t met.
To get started, you need to:
- Represent a real person, brand, registered business, or entity
- Be the only presence of this person or business aside from language-specific Pages or profiles. Furthermore, only one Page or profile per person can be verified
- Your Facebook Business Page must be older than 3 months and connected to an Instagram business page
- You must have a complete profile with an about section, Page or profile photo, and recent activity on your feed, including one post.
- Have full control of the business account, which should be in good standing
- All admins must use two-factor authentication to access your account – in fact, it’s very difficult to do anything business-related without this activated.
Notes:
- Each person can verify 2 accounts: a Facebook Page and an Instagram account. If you want to add another account to your profile, you can do so for an additional reduced fee. This would apply if you want to verify your personal profile, also known as a creator account, as well as for a business or brand.
- If you’re eligible, you’ll see a ‘Start verification’ button in the Security Centre. If not, and you believe your business should be verified to access a product or feature, you should check your emails for a notification stating you need to verify your business. Follow the instructions in the mail.
- Whatever you do, don’t provide false or misleading information during verification or attempt to claim and verify a business you’re not authorized to represent. Meta takes this very seriously and doesn’t tolerate any attempts to circumvent the verification review system. You could have your business verified status revoked, or Meta may take additional action on the account.
- You won’t be able to change your business asset’s username, profile name, category, or location settings once you’ve begun the verification process and made your first payment. You will need to cancel your subscription and go through the verification process once more with the new details.
- Once your verification application is approved, you can update your Facebook Business Page profile picture.
How many followers do you need to get verified on Facebook?
The internet is loaded with conflicting information here, so I’ll set the record straight. Meta Verified does not require a minimum number of followers to verify a Facebook Business Page.
Whether you’re a well-known public figure or not – Meta couldn’t care less. Previously this was different when verification was more for celebrities and public figures, where you needed a minimum of 500 followers. This is no longer the case.
How do I get verified on Facebook and Instagram in 2023?
There are a few ways you can go about getting that little blue checkmark on Facebook and Instagram. You can follow these steps to sign up for Meta Verified for your Facebook Business Page:
Verify from Meta Business Suite on your desktop
Stage 1: Choose your business assets and set up payment
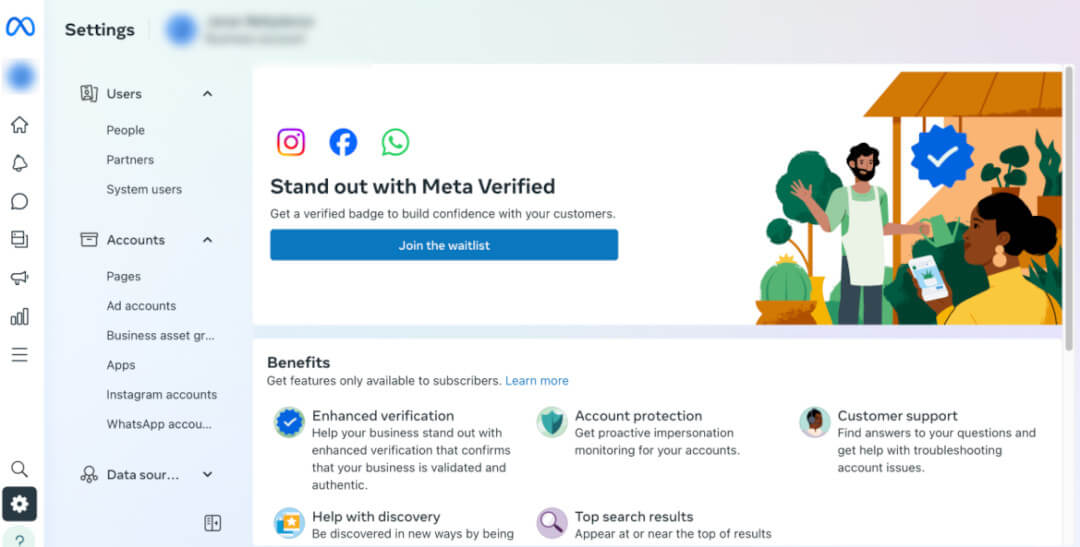
- Log in to your Business Manager account and click “Settings” in the left menu.
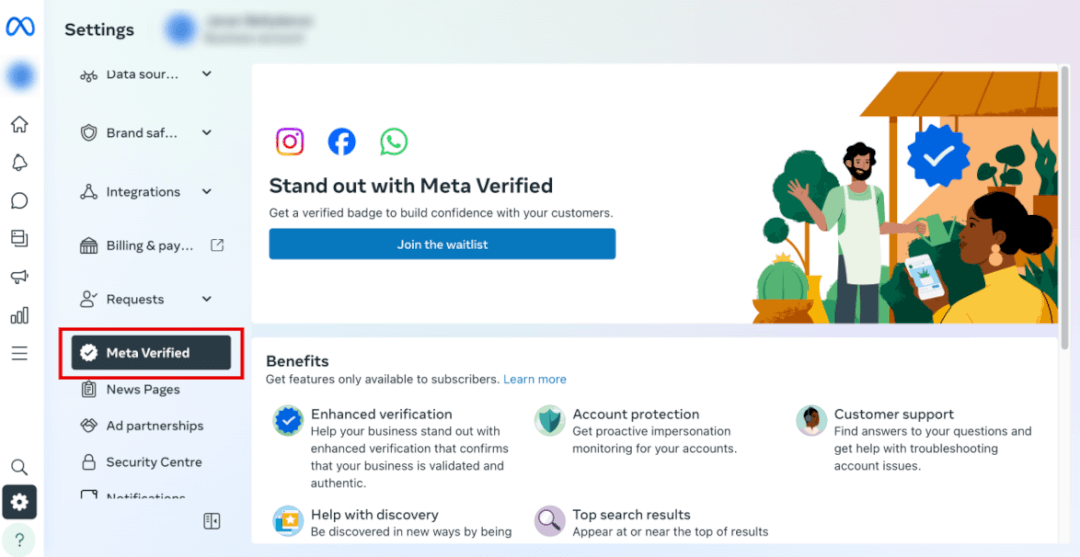
- Click “Meta Verified” in the left menu, then click “Sign up now” or “Join the waitlist.” (If you don’t see it there, click here and follow the prompts so you can add yourself to the waitlist.)
- Select the business asset (which could be a personal Facebook account, an Instagram account, or a Facebook Page) you want to verify, then click “Sign up now.”
- Choose your location and currency, then click “Next.”
- Review your subscription, then click “Next.”
- Add a new payment method, or select an existing one, then click “Next.”
- Click “Confirm,” then click “Next.”
Stage 2: Turn on two-factor authentication (in case you haven’t set this up yet)
- Click “Set up” to enable two-factor authentication on your personal account.
- Choose the security method you want to add, then follow the on-screen instructions.
- Click “Turn on” to make two-factor authentication a requirement for each person on the business account.
- Make sure that two-factor authentication is enabled, then click “Next.”
Stage 3: Verify your business details
- Click “Start verification.”
- Select the country that your business is located in, then click “Continue.”
- Enter your business information on the next screen, then click “Next.”
- Select your business from the list of results, then click “Next.”
- Review your business information, then click “Next.”
Stage 4: Choose a verification method
- Choose between email, text message (SMS), phone call, or domain verification, and continue following the detailed instructions.
- Choose the option best for you and continue following the on-screen instructions. The information you provide must match the business information on the Page, especially the phone number, email address, and website.
Verify Facebook from the mobile app
Whether you’re using Apple or Android, the process is pretty similar, and you’ll automatically be shown the personal and business assets that are eligible.
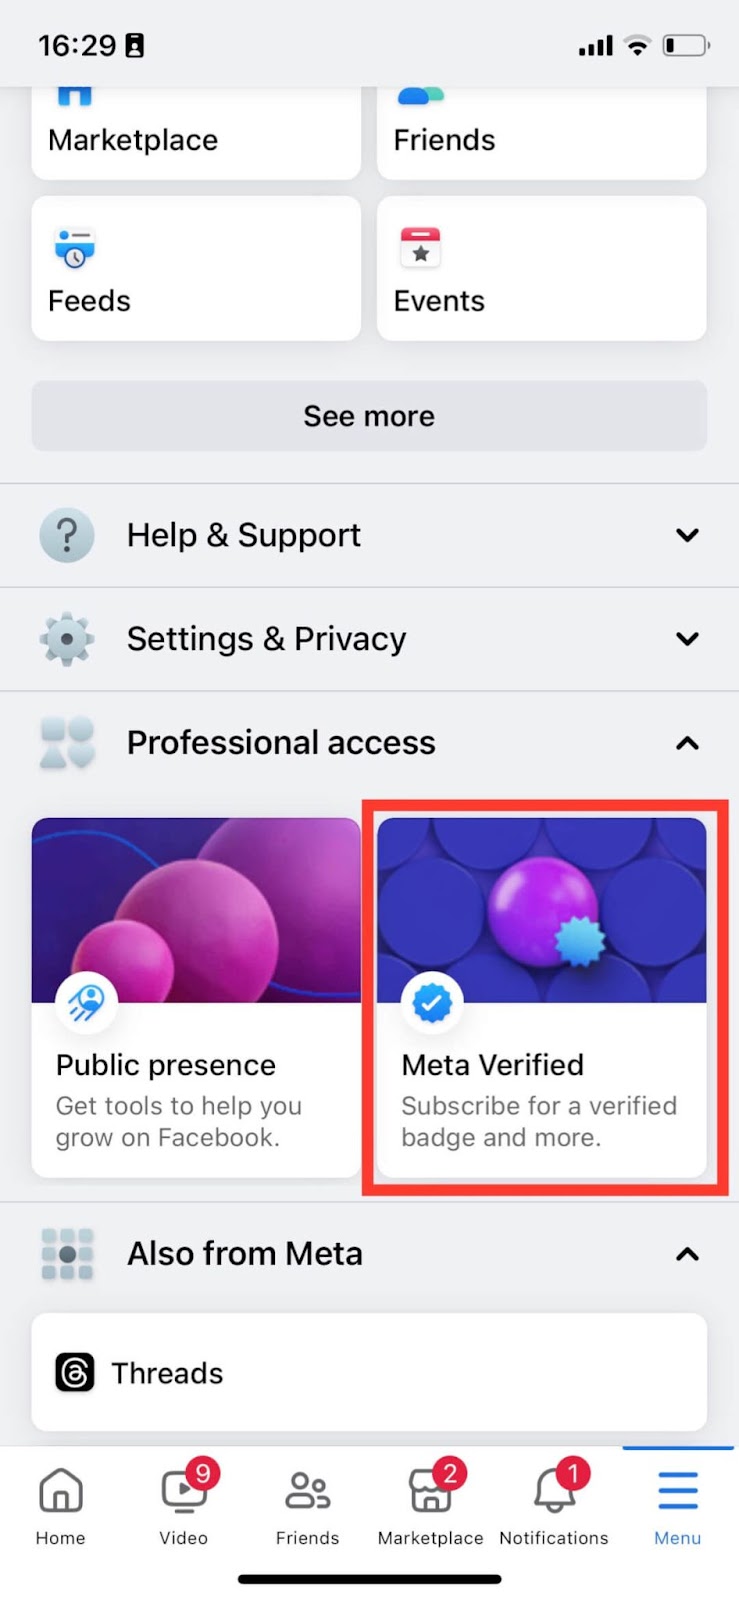
- Open your Facebook app and tap on the three-line menu to get to your profile.
- Scroll down the page until you see “Meta Verified” and tap it.
You’ll go to the Accounts Centre, where you’ll find the Meta Verified submenu item at the bottom of the menu on the left.
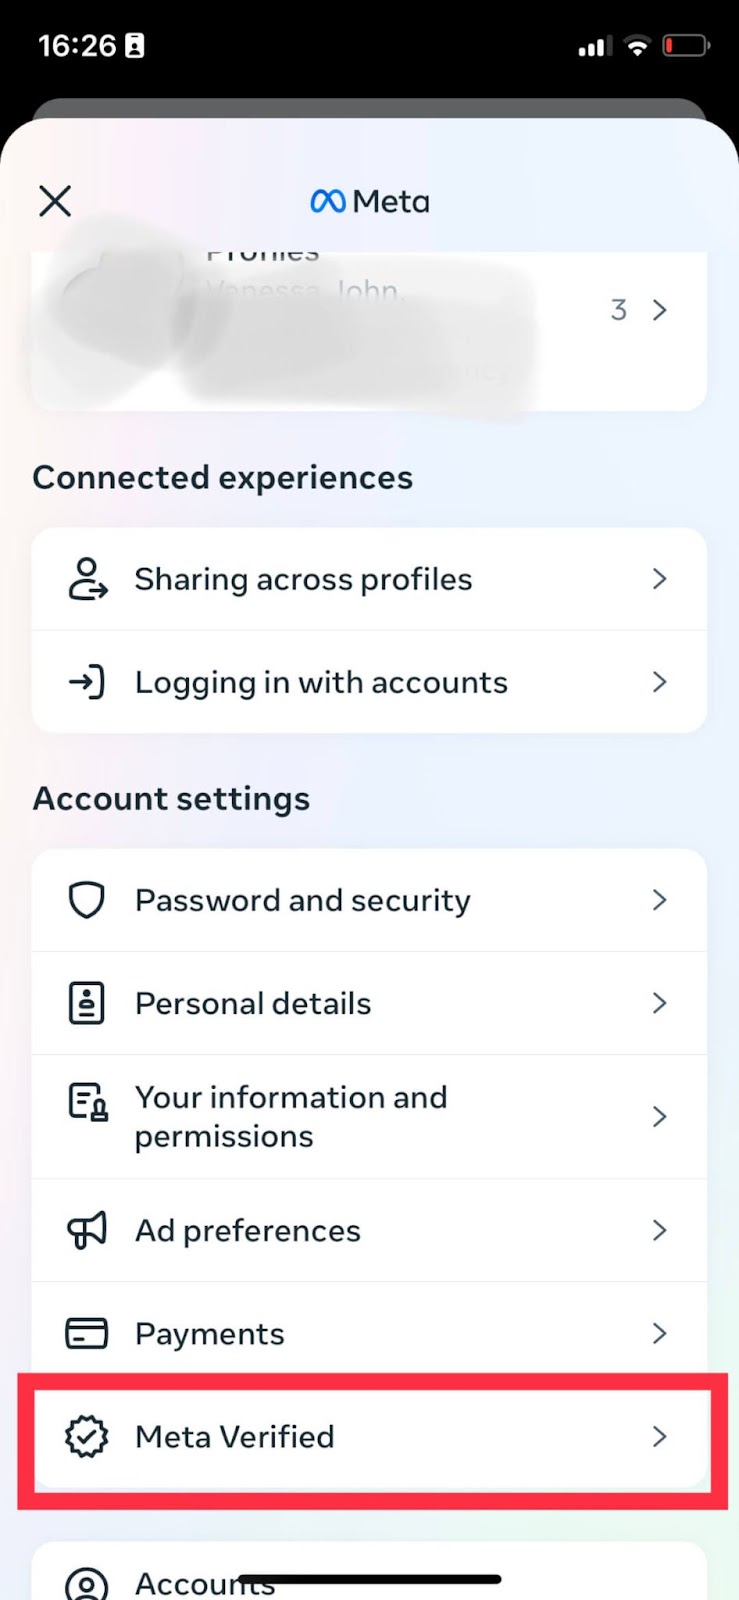
- Next, you can choose the profiles(this could be a personal Facebook account, Instagram page, or Facebook Page) you want to sign up for and then follow the prompts to confirm your subscription.
- Once payment is made, you’ll access your Meta Verified benefits.
Notes:
- You can also access the Account Centre from the Instagram app and complete the verification process there. The steps are almost identical.
- After you’ve completed the verification process, you’ll receive access to Meta Verified benefits, including account support (!). The four benefits include a verification badge once you’ve successfully gone through the process, proactive account protection from impersonation, exclusive stickers across Stories and Reels plus 100 Stars a month, and direct account support – WITH AN ACTUAL HUMAN.
- Subject to certain conditions, you can update your verified business profile picture twice every 60 days.
- Verification decisions can take anywhere from 10 minutes to 14 days to be made, and you’ll be notified of the decision.
Once verified, your badge will be displayed:
- On your business Page
- In the comments section next to your business Page’s profile picture
- In search results next to your business Page’s name and profile picture
- In direct messages next to your business Page’s profile picture
- In Reels, Stories, and Feed
- On Facebook Watch
Improve your chances of getting verified on Facebook
With the new process, it may seem easier to get verified on Facebook because you pay for it, but it’s still an application process that requires approval. These tips can help you get your blue check verification badge:
- Be professional – be respectful to other users, use professional language in your posts, and keep your feed clean with no policy violations. Meta looks at all of this when considering your application.
- Update your business info – Make sure your business details are up to date on your Instagram and Facebook Page as well as your Business Manager
- Fill out your details – the more info you include on your business profile, the easier it is for Meta to verify you
- Link to your other business assets – make sure they’re all branded assets and not mixed with any personal ones
- Post consistently – regular activity tells Meta that you are an active user and gives historical data
- Run Facebook ads – in that case, you won’t have to submit as much information as your billing info is already saved on Meta
What happens if Facebook rejects my application?
Two of the main reasons for verification being unsuccessful are:
- They need more information – This could be for many reasons: your ID pic is unclear, your document is expired, illegible, or not viewable, the language isn’t supported, or the document isn’t accepted.
FIX: Visit the Support Centre to pick up where you left off in the application, and watch out for any notices about your verification status.
- Your submission was rejected – These reasons include submitting or being suspected of submitting false or misleading information, attempting to claim a business or Page you’re not authorized to represent, trying to circumvent the verification process (there are no shortcuts or hacks!), or your website doesn’t load, doesn’t have an SSL certificate, or leads to an error page.
FIX: You may be eligible for an appeal, so visit the Support Centre to see the status of your verification application. If your application is unsuccessful after an appeal, you won’t be able to pursue getting your Facebook verification.
Ensure you remain verified on Facebook
- In case you don’t know by now, the number one rule is to adhere to Facebook’s Community Standards. If you run a business on any of the Meta platforms, you need to keep your digital nose clean and make sure you stick to Meta’s Terms of Service and posting guidelines.
- Make sure your Meta ad account is in good health. If your ad account is disabled or your ad is stuck in review, make sure you deal with it appropriately so your account health isn’t affected.
- Maintain your online presence with a solid marketing strategy that includes your social media management.
- If you advertise on Meta, make sure you don’t violate any of their advertising policies either.
Conclusion
Getting verified on Meta needs to align with your personal or business goals for the subscription to make sense. While many businesses may see the pros, there are just as many who don’t understand why they should pay for it. It’s best to look at your social media and online presence as a whole and see where you are in terms of your business trajectory to decide if it’s worth it.
If you have any questions, please feel free to contact us.